
"No place is boring, if you've had a good night's sleep and have a pocket full of unexposed film."
-Robert Adams
While it may be true that most of us do not use film anymore when taking pictures, the previously stated quote permits us to recognise that nothing in this life is genuinely uneventful and that photography can be practised by shooting images of the simplest things with any background or scene as your focal point.
We don't have to travel to parts unknown to hone our photography skills since taking a fantastic photo can be done without leaving our homes.
So, with enough energy, passion, and willingness to learn, everybody can become better at taking pictures. Nonetheless, it's important to mention that becoming better means making it a priority to familiarise yourself with aspects of photography such as framing, composition, shutter speed, ISO values, and aperture.
Without further delay, in today's article, we shall discuss the fundamentals of aperture and how beginner photographers can improve their abilities and control of the craft by following the tips of a professional instructor.


What is Aperture?
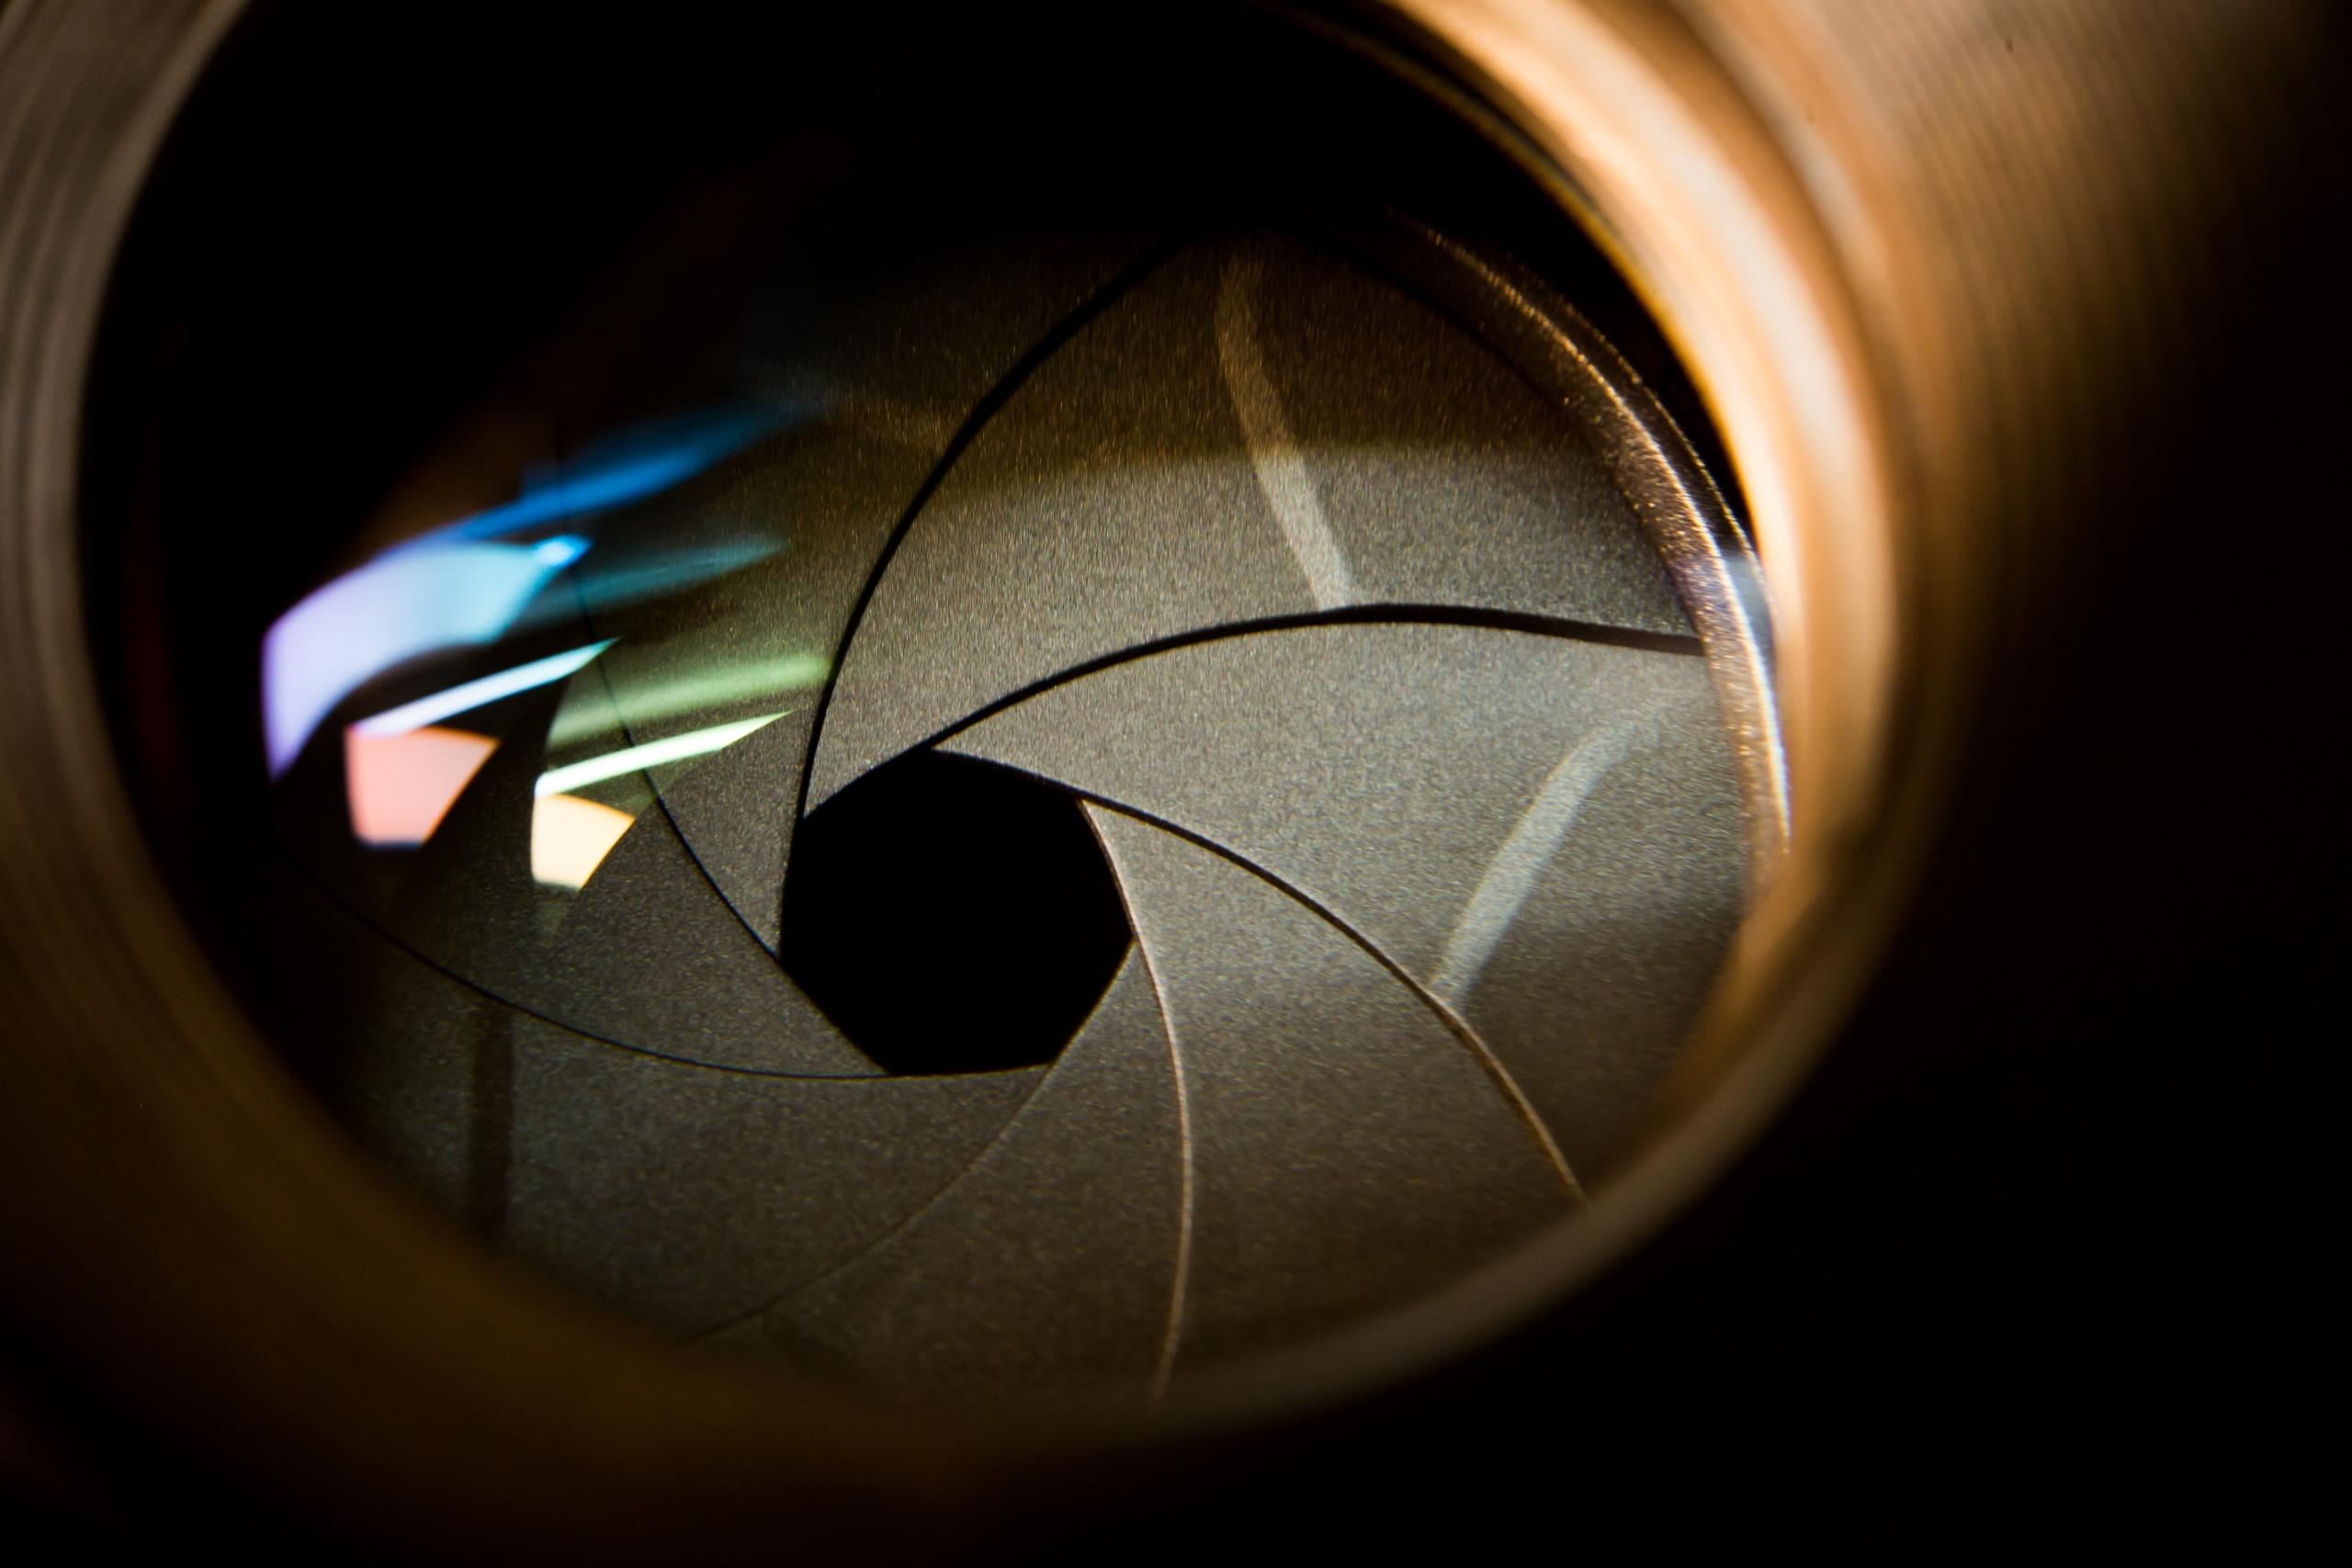
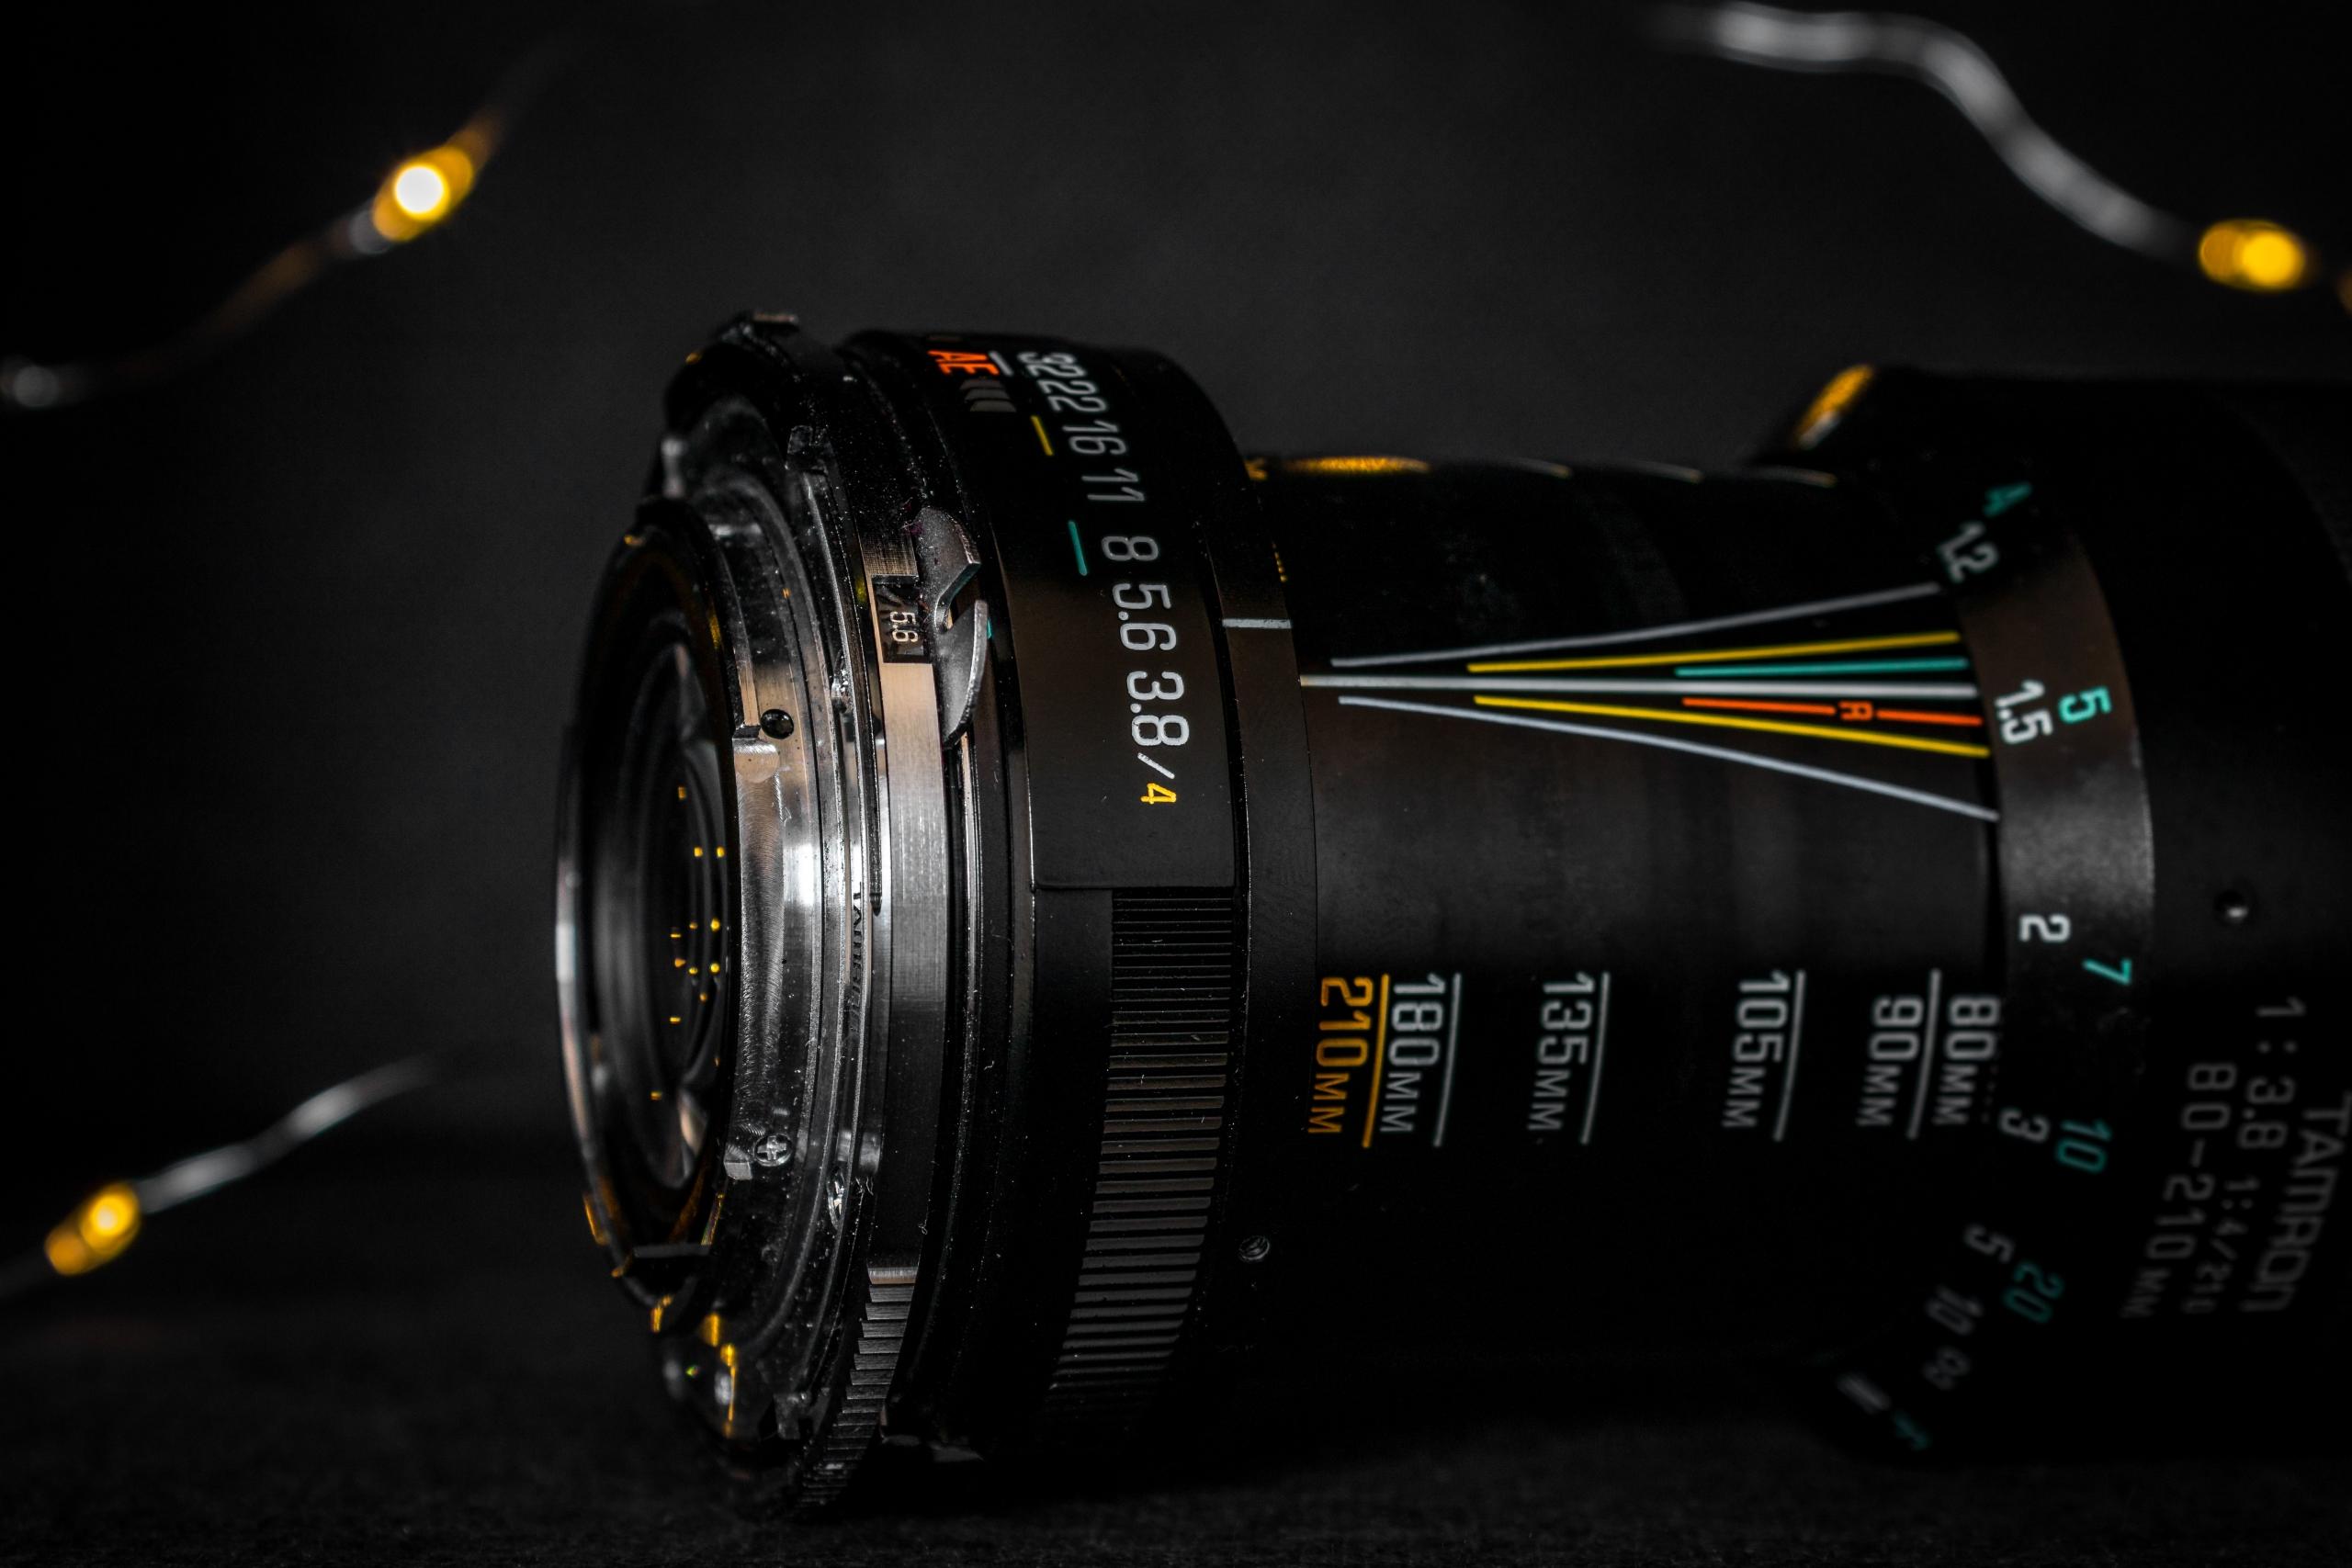
Most persons are familiar with photography terms such as lenses, zoom, cropping, and filters; additional vocabulary such as aperture may be entirely unknown to beginner photographers. So, what is aperture? In the most straightforward definitions, the aperture in photography can be described as the opening of a lens's diaphragm through which light passes. Now, you've had aperture explained to you!
Aperture on a camera is classified and calibrated by using f/stops and is generally written as the following:
- 1.4,
- 2,
- 2.8,
- 4,
- 5.6,
- 8,
- 11,
- 16.
It's important to state that lower f/stops allow for more exposure since they represent larger apertures in the lens of the camera. On the contrary, higher f/stops give less exposure to light since the crack of the camera lens is much smaller.
Aperture ranges are pretty complex for beginners to understand; nonetheless, they are widely used on cameras and can be learned more about if you want by reading your camera manual, following the example of a masterful photo taker, and playing around with the settings.
Also, while some might ask whether it's best to have a higher or lower aperture, the apertures used ultimately depend on which type of photography you like better and are setting out to do. For example, a higher aperture is better for taking pictures of landscapes in the daytime or shooting some group shots with quality cameras. However, on the other hand, a low aperture camera is best for getting photos in settings with low light such as the evening or the nighttime and creating bokeh.
But why is aperture photography so crucial to photographers? Do apertures really make a remarkable difference in an image? The answer is yes. The list below mentions some of the most essential reasons why aperture is necessary to create a maximum effect:
- Aperture determines the maximum amount of light in a photograph,
- Aperture dictates the depth of field,
- Aperture has a lot to do with just how sharp an image will look.
Therefore, it's in an amateur photographer's best interest to consider utilising aperture when taking a photo to acquire the desired effect with both small and large cameras.
What are Tips for Using Aperture in Photography?
To better understand using aperture, a new photographer must have aperture explained to them and know what to do with each f-stop. Though we briefly mentioned the f-stops in the previous subheading, the list below features tips on when every aperture mode should be used:
- f/0.95 – f/1.4: the fastest and most maximum kind of aperture, they are primarily available on specialised lenses purchased for taking photos in the dark, shooting evening pictures at a wedding, or taking portraits in the dimly-lit streets. With f-0.95 to f-1.4 aperture stops, you can get shallow field depths at close distances with the correct exposure.
- f/1.8 – f/2.0: also great for low-light shots, f-1.8 to f-2.0 stops create very aesthetically pleasing pictures that provide great depth and angles at a close range.
- f/2.8 – f/4: the most standard and universally used aperture stop, f-2.8 to f-4, are the restricted mode on various camera lenses. These aperture stops are fantastic for multiple reasons, such as travel, sports, wildlife, and other types of everyday photography that makes the subject the focal part of the image.
- f/5.6 – f/8: seen as ideal by experts in photography, the f-5.6 to f-8 stop range aperture is perfect for individuals who want to spend their time taking pictures of landscapes. Providing excellent sharpness in each image, any f-stop between 5.6-8 is just perfect for group shots.
- f/11 – f/16: used by many photographers for landscape pictures and macro photography, aperture stops f-11 to f-16 are the perfect size since they provide a significant depth of field observed in the images. Sometimes sharpness is lost, and there's a blur when taking pictures with a stop lens that is above f-8. However, this may be desirable for photographers looking to create a bokeh effect.
- f/22 and less: used by complete beginners who have no idea what they are doing, camera aperture modes f-22 and less are very basic and will not drastically change the exposure, the depth, or the focus of an image. At this level, pictures look very ordinary, and they may often be grainy since they aren't sharp. If you want to acquire control of the craft isn't, don't make it a priority to constantly use an f stop above f/22.
Remember, the smaller the aperture number, the more light is transmitted through the opening and portrayed in each photograph. So, the best way to get comfortable using aperture is by taking photos with each mode, playing with your settings, and determining if you like the way it looks. But, are there any additional tips to consider when using an aperture camera? Absolutely.
Thanks to the camera experts at Magzter, the following professional tips about aperture can be used on your camera to get the right effect for every image:
- Draw Focus to the Subject Using the Right Aperture: by using a wide-angle aperture like f/5.6, your portrait photography is made to stand out because you will blur out the background to capture the eyes and facial features of the person you are photographing. Working with aperture will dramatically improve the look of portrait and still-life photography to get sharp images.
- Adjust the Aperture to Get Wide Angles: to get a sweeping panoramic picture that captures various aspects and the length of an entire landscape scene; it's necessary to adjust the aperture stop to one like f/13, for example. By having more light in the opening of the camera lens, you can get more area to focus on and not just a close-up that doesn't boast a broad depth of field.
- Practice Using Different Aperture Stops: to get a handle on the different settings and apertures of your camera, it's essential to snap as many shots as possible and of multiple things. Have unique objects or subjects and take as many images with all the aperture stops; this will help you feel more prepared for photography sessions when you need to be.
Suppose you're wondering which camera or lens you should purchase to practice your aperture skills, it's important to state that there is no "perfect" camera to buy but rather an ideal setting or mode on your camera that can be utilised to give you the right effect. Furthermore, as we have seen, every type of photography requires a unique aperture. So, don't think you need to invest tons of money to use aperture in the best way.
Where Can I Find an Aperture Photography Tutor in the UK?
To improve any skill or hobby, it's always necessary to have someone guide you with their words and years of experience; photography is no different. Even the most talented photographers, the "prodigies", need to heed advice from a number of qualified ones in their field.
So, the answer is quite simple, when learning photography, you need to hire a professional tutor. Personal photography instructors can teach you the "essentials" of photography such as the following:
- How to become familiar and use your lens effectively,
- Mastering the correct shutter speed,
- Working with adequate ISO values to get the desired effect,
- Knowing how a camera's sensor dictates the difference between a sharp and a blurry photograph,
- Learning about a camera's exposure by playing with settings such as f/stops, sensors, and shutter speeds.
In addition, to help with the previously stated photography skills, personal aperture photography tutors are known for personalising lessons to meet your needs, offering valuable pieces of advice, and moving their schedules around to suit your needs.
But, where does a person find a photography tutor in the UK? Look no further than Superprof. With more than 17 million tutors who are part of the Superprof community and specialise in 1000+ topics of interest and academic disciplines, Superprof is becoming a large tutoring site that is on its way to being number one!
By selecting an aperture photography tutor on Superprof, you are assured of the following:
- Affordable lessons that won't break the bank,
- Experienced tutors that have many years honing their craft and accreditations to back up their skills,
- An easy-to-use lesson booking system,
- A fantastic tutor/student support staff to help guide you.
According to our most recent search, more than 300 photography tutors across towns and cities in the UK on Superprof would be happy to discuss apertures meaning and how small steps can make a large difference when capturing excellent photos with your camera!
In conclusion, learning more about aperture photography and its use will bring you one step closer to taking outstanding pictures using the right settings and the perfect background.
Summarise with AI:
Did you like this article? Leave a rating!


